Bandai AT-AT with LED lighting
I’ve always been a big fan of the AT-AT walkers that were first introduced in Star Wars the Empire strikes back. I still remember sitting at the theatre when I was 11 years old and being totally amazed by them.
I saw a great youtube video about this build and decided to ahead and order the kit.
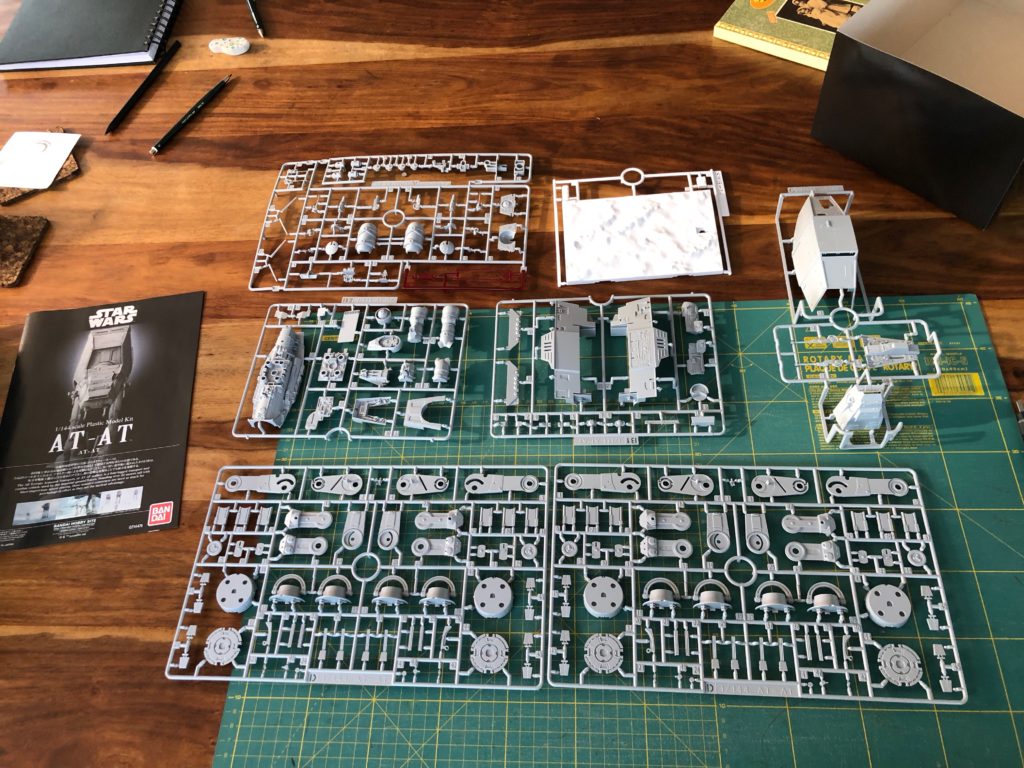
Great build quality
When you look at the box art, the manual as well as all the pieces you can see that Bandai kits are of a very high quality. It just feels like the people behind this product really loved creating it. You can see it in the many very small details that really make the difference.
No glue needed !
At first I was skeptical about the fact that this model kit does not require any glue. But the build quality is so good that this is really true. Everything just fits perfectly and “klicks” together so that glue really only is required for very small pieces or – in my case – to make the two big main body shells really fit together well.
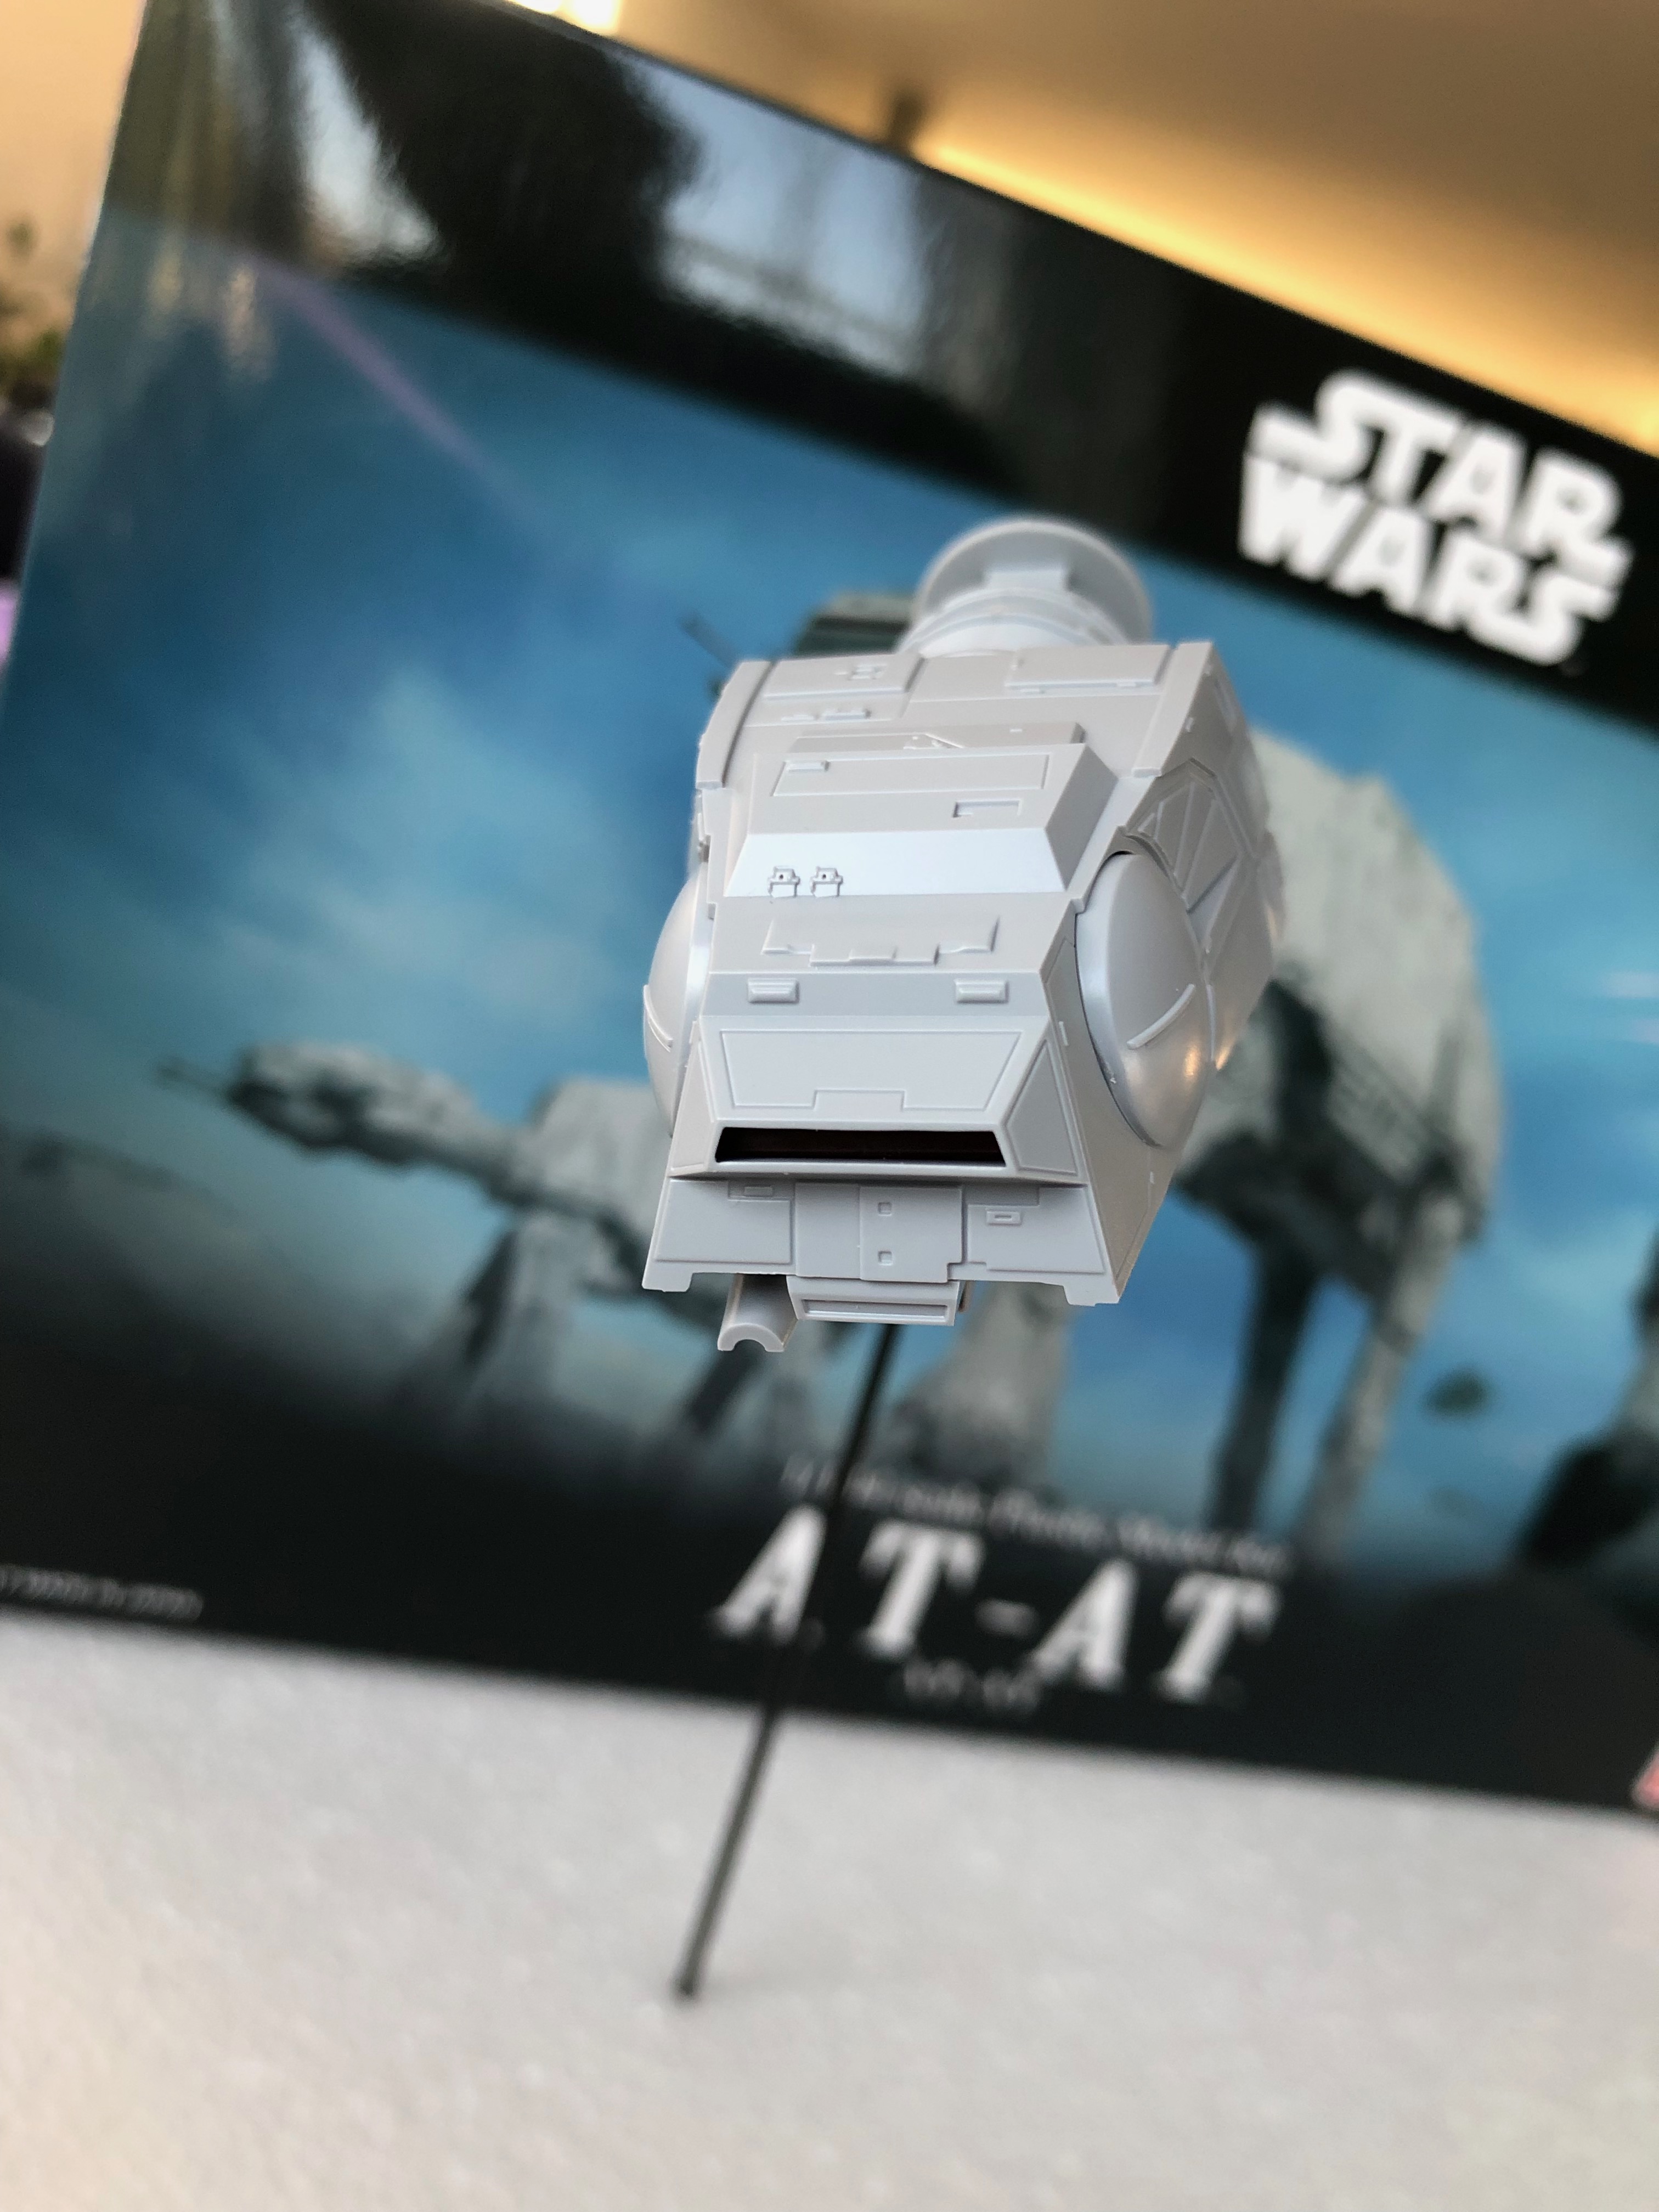
Red cockpit illumination
Even though in the movies (I think) you can’t see the cockpits light up red but I have seen many cool illustrations where you can see a slight red glow from the cockpit. So I decided to go ahead and try to fit a small 2.5mm LED in there as I have many of those from my X-Wing project.
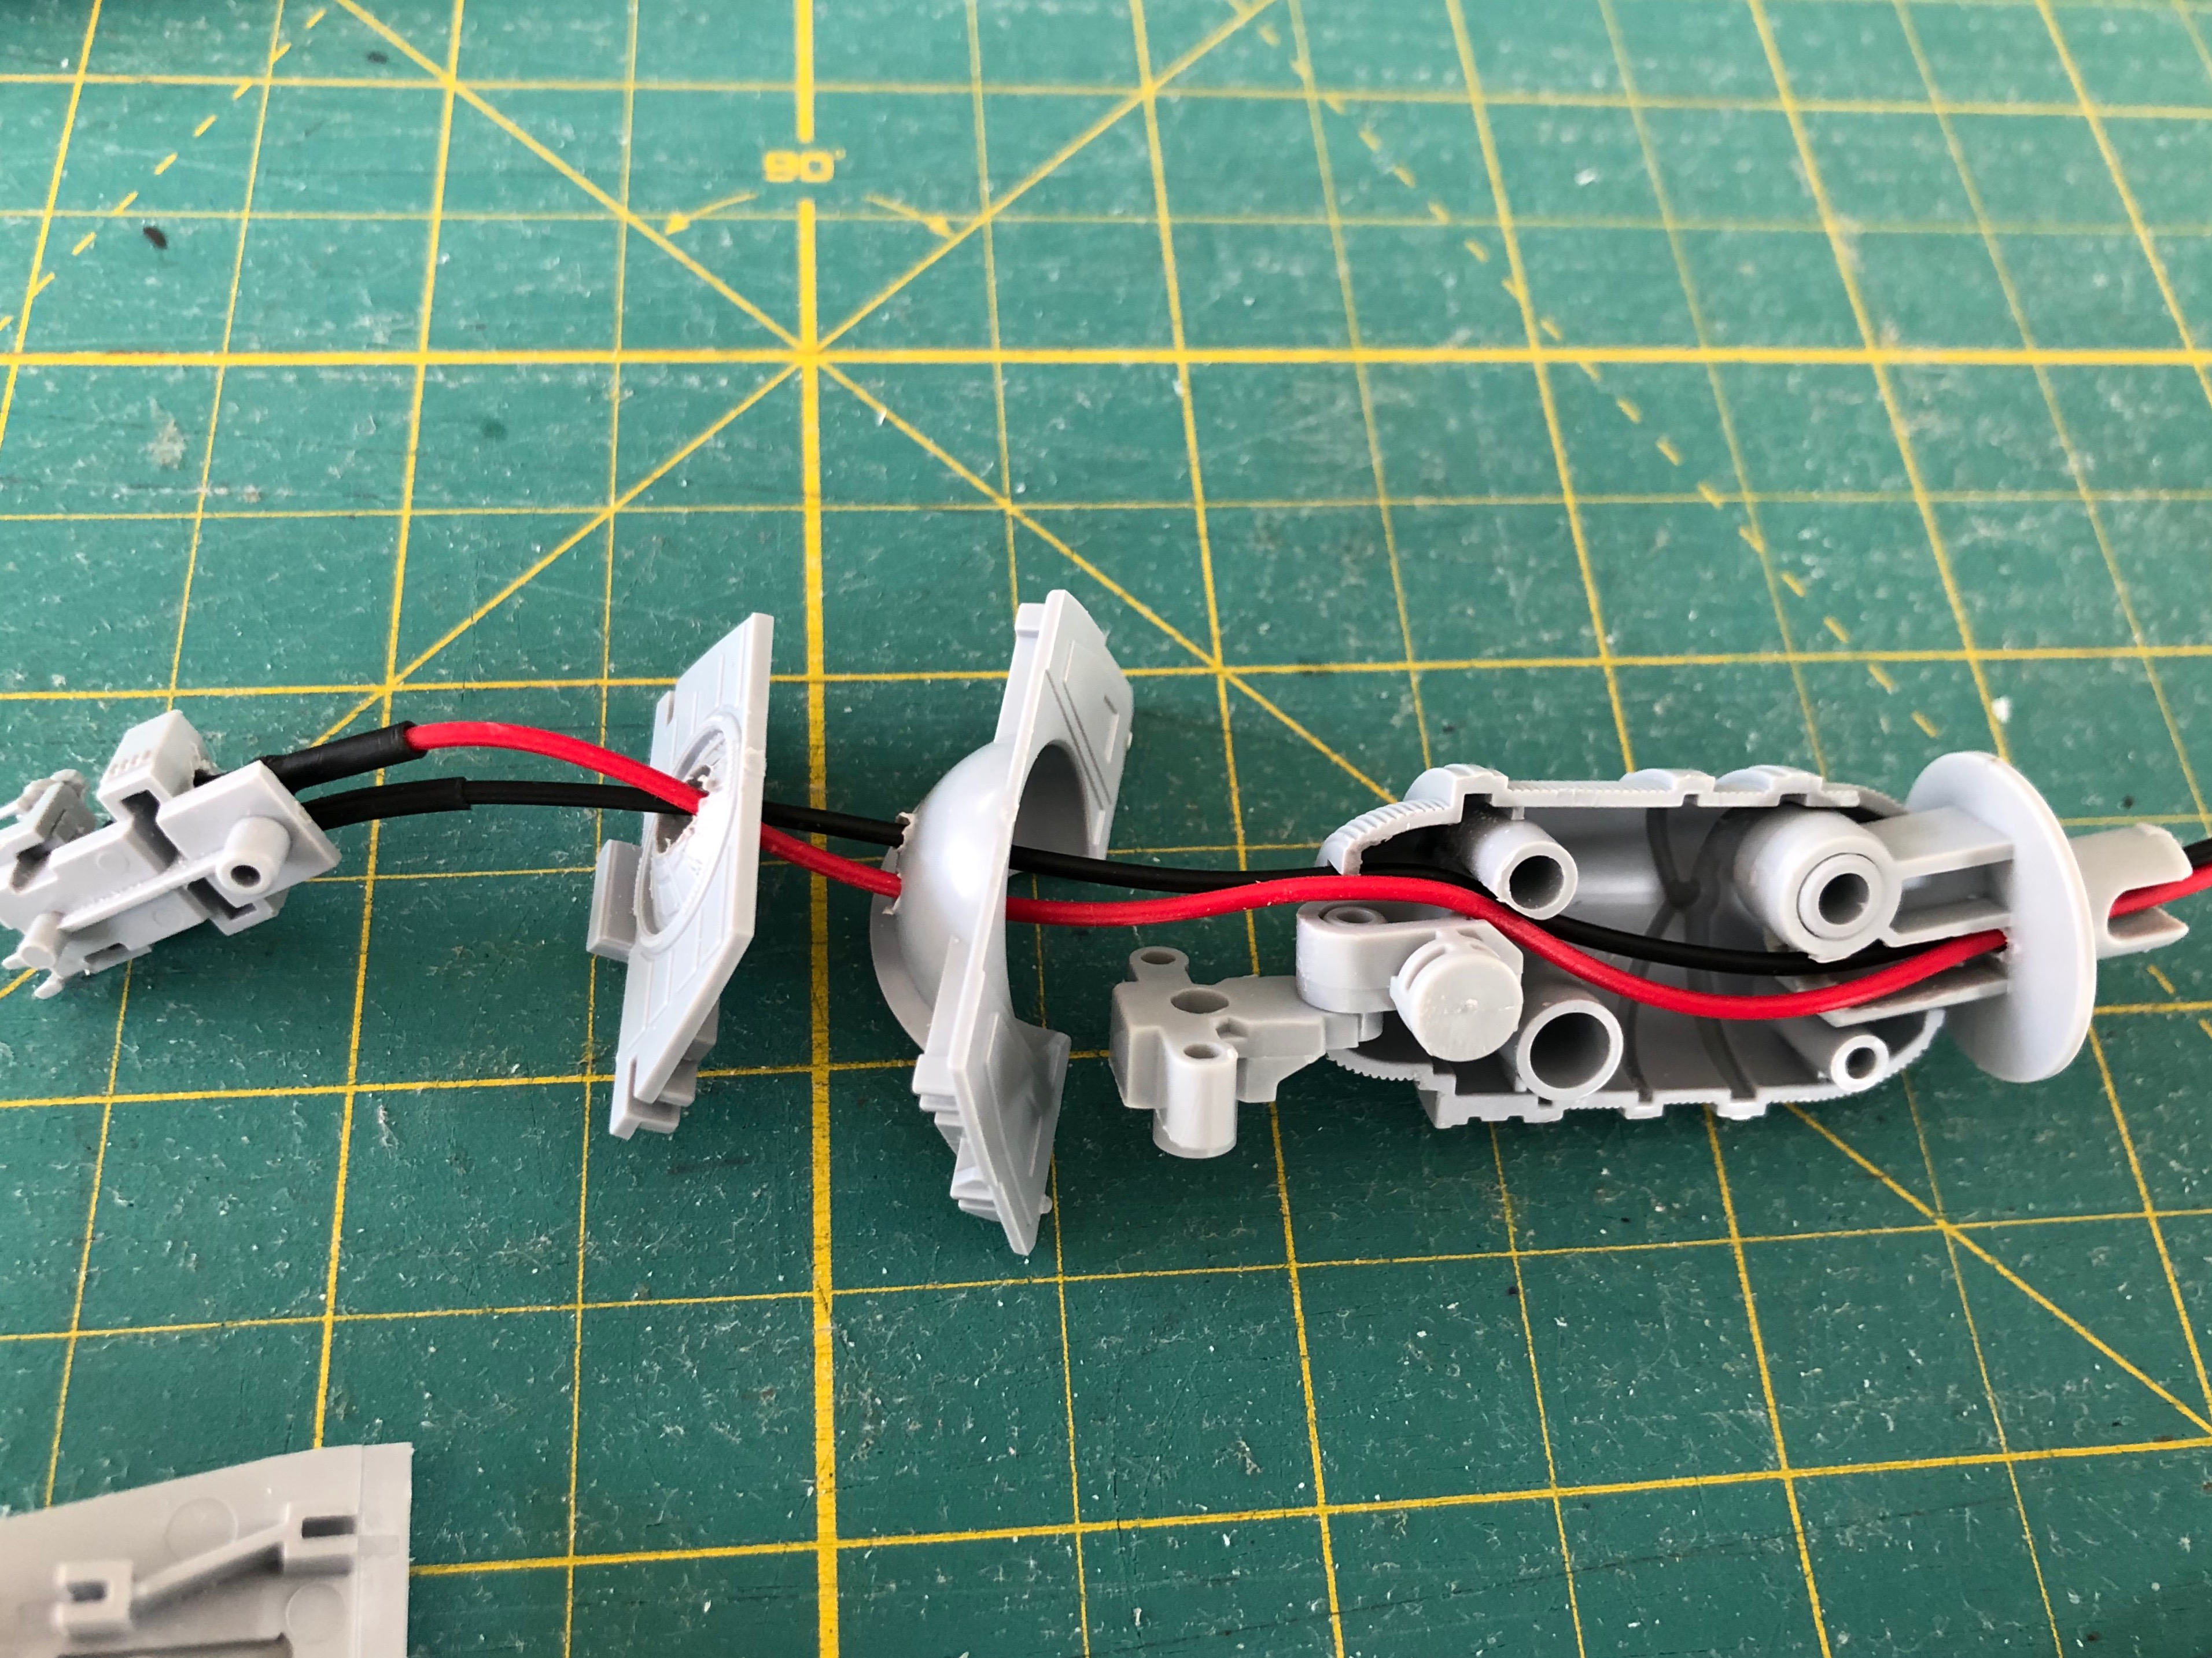
So i went ahead and built the head and neck section first to see how it all fits together so that I could then figure out how to get the LED and two cables in there.
As the parts fit together so well it was not very difficult to figure out where I would need to drill some holes or file away some plastic to make the wires fit.
Preparing the head and neck for LED lighting
The hardest part was that in order to make everything fit together perfectly I first had to sort of “string it all together” and then follow the instructions again as the parts have to be put together at a certain order.
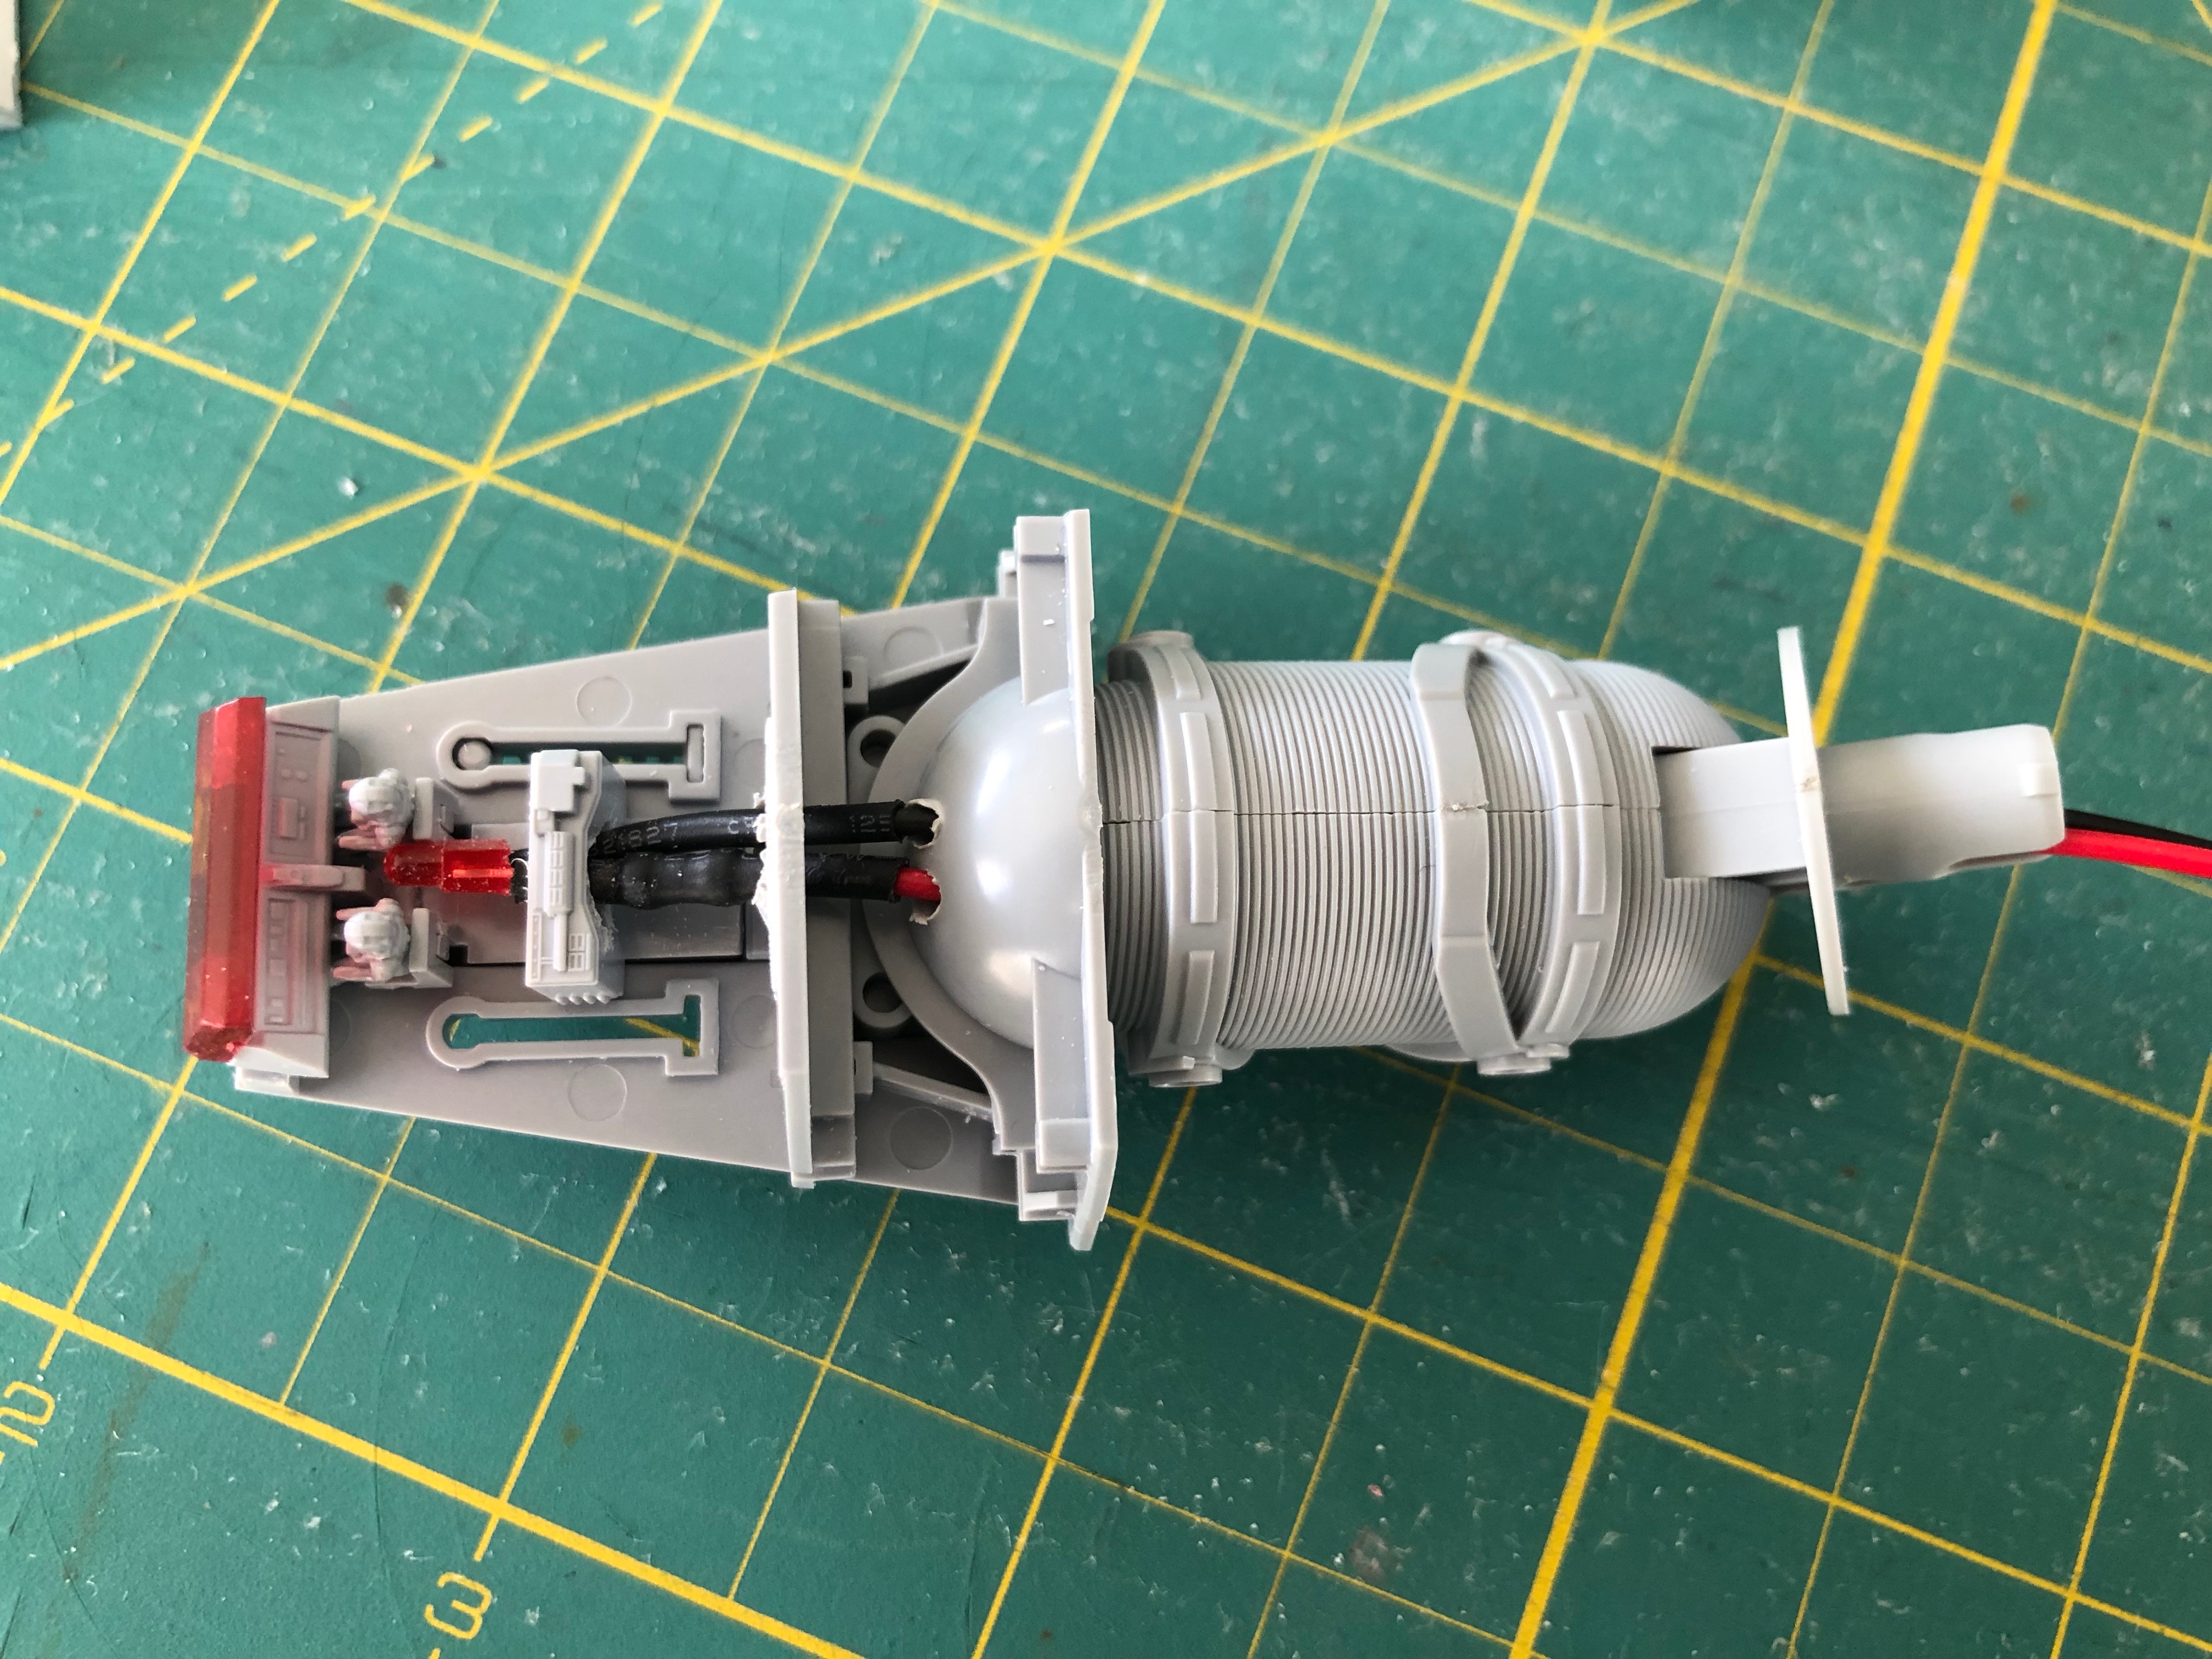
Once it was all back together I just had to slide the cockpit into the main head piece and – voilà, let there be LIGHT : ) I think it looks pretty cool.


A much simpler and less intrusive solution: imgur.com/iwGwLrQ
Very nice !