How to build your own “Disassembled vintage iPhone framed Display”
I don’t know about you, but I have a bunch of older iPhones lying around my house. Starting from the iPhone 2G all the way to the iPhone 6, I have all of them collecting dust in a drawer. Then I came across these commercial offers on Etsy or Xreart selling disassembled framed iPhones.

As I know how to use Photoshop and like to do stuff by myself, I decided to build this on my own.
What you need
So here’s the list of materials you will need:
- Old iPhone, depending on the model, you will need to create a different template
- Adobe Photoshop or similar application
- A 3D Photo Frame, I ordered this one on Amazon: 30×40 3D Photo Frame
- A print shop in your area that will print your design on a 300g / A3 paper. If you have a suitable printer at home, you can do this yourself as well
- Tools to open and disassemble your phone. You can easily google this and order the specific screwdrivers
- Multipurpose Glue, i used this Pattex Multipurpose glue
- Instructions on how to disassemble any model of iPhone can be found on youtube. Just look for “iPhone xxx disassembly” and you’re all set
Disassembly
I first wanted to use my original iPhone 2g for this but just could not bring myself to disassemble it, as it still works perfectly. So I decided to use an old defective iPhone 3Gs. With the correct video on youtube disassembly of the was was straight forward.

Creating the template
After disassembly, i went ahead and looked at the layout of some of the offers online and created my own template in A3 format using photoshop. The end result looked like this:

I also created one for the iPhone 2G but ended up not using it:

If you are interested in getting the PSD original file that I created, you can download it here: Dropbox file link to PSD file
Printing
Even though I do own an A3 ink jet printer, I did not trust that it would provide the necessary quality. So i went ahead and ordered prints at a local copy shop on A3 paper with a thickness of 300g. It only took a day and the quality was great.
Assembly
First I printed a test of my template on regular paper to see if everything would fit. I did have to make some adjustments so it was a good idea to test everything first before ordering the final prints.

Once the frames were delivered from Amazon and the prints arrived, it was time to glue all the pieces to the professional prints. Some of the parts are tricky as they do not offer a lot of surface for glueing. I used a rubbery “Mossgummi” material which I cut and glued to the parts in order to get the right thickness and a good surface area. This was used for the back plate as well as the screen.

I let it all settle for a couple of hours and then did the final assembly into the black 3D frames.

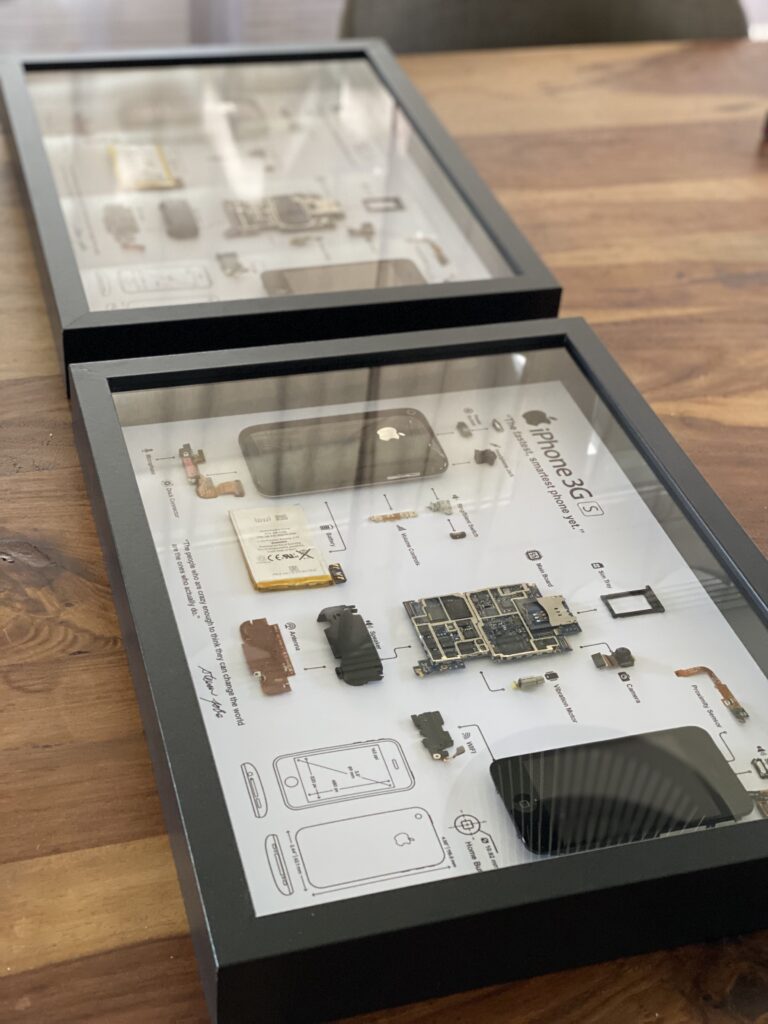
The final product
So here’s the final product. I think it turned out great. I did two sets, one of which I am going to use as a gift.


Hi, wonderful job!
On dropbox I see only 3GS teardown. Could you share also 2G and and other (if you have)?
Thanks
Hi, wonderful job!
On dropbox I see only 3GS teardown. Could you share also 2G and and other (if you have)?
Thanks
Glad you like it! I will check if I still have the files
Thanks! I’m waiting for your reply 🙂
https://www.dropbox.com/s/4rkxro6odjy6bhh/iPhone%201%20Display.psd?dl=0
Wow! Thanks a lot! Can I share these on my youtube channel?
https://www.youtube.com/@BerTechh/
3g have? (not s )
Sorry but I only have the ones available you see on my site.
Here is the link to the original iPhone photoshop file: https://www.dropbox.com/s/4rkxro6odjy6bhh/iPhone%201%20Display.psd?dl=0
Wow! Thanks a lot! Can I share this for free on my YouTube channel?
https://www.youtube.com/@BerTechh
Thakns
Yes, if you make a reference to my blog, sure you can.
You have design for Iphone 11 above?
Or how we detect size of all elements to draw it.
Unfortunately I do not have any other templates. You just have to “eyeball” it yourself.
Thank you, I also use PTS, I am just concerned about dimensions of each element
Hey there..
Do you have same template for 6S..
TIA
Hi – unfortunately I only have the files i linked in the blog post.
thanks
Hi,
Have you please template for iPhone 4? I’ll pay for it possibly 🙂
Thanks! Have a nice day
Hi – Unfortunately I don’t have any other temmplates than I have already shared. But you can use the photoshop files i provided and create your own version if you like.
what frame did you use
Hi – the link to the Amazon product is in the blog post
Is there a iphone 3g model? (not 3gs)
No I only have the ones you see in my download folder
Hi,
Have you please template for iPhone 3G ?
I’ll pay for it possibly
Thanks! Have a nice day
Just wanted to drop a big thank you!