Solar Manager App for Tidbyt – Installation guide

About a month ago I started my little project of figuring out how I can get data from my smart energy controller “Solar Manager” onto my Tidbyt device. For the technical details you can check out this blog post here: Integrating my Solarmanager Setup with the Tidbyt device
So once I got that working, I thought it would be nice to create an official app that everyone could use. With the great help from the tidbyt community, specifically a very nice developer @Dubhouze-Tavis on discord, together we collaborated for a couple of weeks until the app was finished. Thanks so much Tavis for your great help.
Now that the app is officially available for Tidbyt (as I am writing this, it is still in beta), here is a short installation guide:
Installing the app on your smartphone
This is pretty straight forward. Just open the Tidbyt app, click on the “+” icon at the lower right and then search for “solar…” in the app search bar. This immediately should bring up the “solarmanger.ch” app.

Adding the API Key for your Solar Manager setup
Once the app opens, you have to provide certain information about your local Solar Manager setup.
API Key: This is a long string value which you need to copy from the official Solar Manager external API webpage at: https://external-web.solar-manager.ch/swagger.
When you are on that page, this is what you need to do:
- Authorize yourself using your email address and password
- Open the “Customer” section by clicking on the downward facing arrow on the right

- The “Customer” section opens up and reveals a “try it out” button.

- Click on the “try it out” button and then on the “execute” button. This will reveal some code underneath. The code you need is the long string that follows right after ” -H ‘authorization: Basic”

In the image above, my personal API key is covered by the green rectangle as I obviously don’t want to share my privat key here. Copy this long string and either send it to your smartphone via SMS, WhatsApp or email.
- Copy this key and paste it into the “API Key” field in the solarmanager.ch Tidbyt app
Adding your SiteID
Your SiteID is written on the back of your Solar Manager device. It starts with a lot of zeros.
- Add this string to the field “Site ID”
Selecting the information you would like to see
All information you see in the following screens is being pulled once per minute from the solarmanger cloud. So it is not a “real time” display on a second per second basis. Please keep that in mind when you are comparing your local solarmanger app data with the screens on your Tidbyt.
The Solar Manager app provides several screens you can pick from:
Show Main Stats

This screen shows the following information:
- Solar production on the left. Green animated flow moving from left to right.
- Value is always green or grey when it reaches zero. Once solar production reaches zero, the solar planel icon is replaced with a battery icon which displays the SOC status of the battery
- Battery discharge is shown with a yellow flow animation. If no discharge is happening, the flow animation disappears
- NEW: For installations without a battery, the solar icon is not replaced.
- Consumption in the middle
- From or to grid on the right
- Red value with red animated flow when energy is consumed from the grid
- Green value with green animated flow when energy is provided to the grid
Be aware that power flowing from the solar panels directly to your battery will not be shown in the middle consumption value. So if you see a difference between the production and consumption value, your battery is likely charging. Details regarding the battery can be found on the “Show Battery” screen.
Show Battery

This screen shows the following information:
(with a future update, this screen will not be available if no battery is detected in your installation)
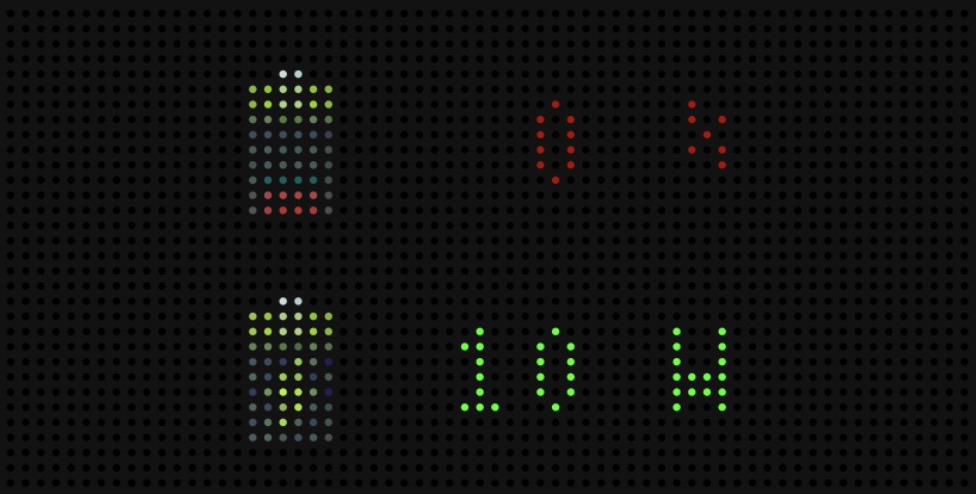
- SOC state of the battery. Animation changes from red (0-25%) to orange (25-50%) to yellow (50-75%) and green (75-100%) depending on how full your battery is.
- Charge / discharge state of the battery in Watts. Shows a green animation if the battery is being charged. Shows a red animation if the battery is being discharged.
Show current production

This screen shows the following information:
- Current solar production in Watts. Value is always green until it reaches zero.
Show current consumption

This screen shows the following information:
- Current consumption in Watts. Value is always red.
Show daily summary

This screen shows the following information:
- Daily summary of:
- Solar production so far in kWh. This value is rounded as there is no space for decimals.
- Consumptoin so far in kWh. This value is rounded as there is no space for decimals.
Autarky

This screen shows the following information:
- Autarky for the last 24 hours
- Autarky for today
- Autarky for the current month
- Autarky for the current year
Custom Sensor Data

This screen allows you to show data for any sensor you have intergrated into your solar manager setup.
In order to work properly, you need the following information:
- Sensor ID. You can find your sensor ID by visiting this URL: https://external-web.solar-manager.ch/swagger.
- On this page, you need to look for the “sensor” section. Put in your Solar Manager ID there and you will get a list of all available sensors in your system.
- Use the sensor ID for the sensor of your choice
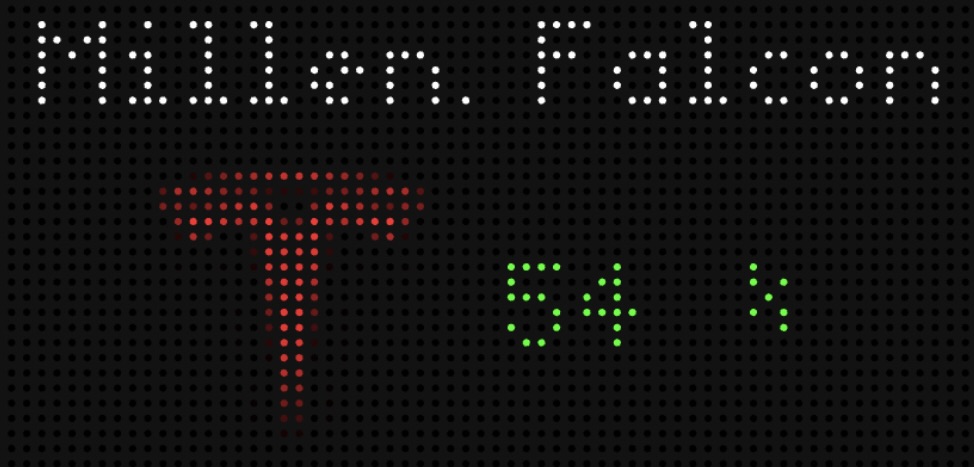
- You can pick between two icons: One that shows an EV charging which you can use for your wallboxes and a generic icon which you can use for any other sensors you would like to display
- The frame shows the consumption for the current Day, Week and Month.
Battery SoC status

This screens allows you to add information about the battery state of charge (SoC). In order to display this information you need to fill out the following information in the app:
- EV Battery ID: Go to the solarmanager.ch external API page: https://external-web.solar-manager.ch/swagger. Go to the “Data” section on that page and execute the command. Scroll down until you find a sensor ID entry that has a “SOC” value. It should look like the image below. Just copy the long number after “_id”.

- EV Name: Just enter the name of your car
- EV Brand: You can pick from a list of car brands
- VW
- Tesla
- Audi
- BMW
- Seat
- Skoda
- Cupra (will follow shortly)
- Hyundai (will follow shortly)
- Renault (will follow shortly)
- Opel (will follow shortly)
If you want to display multiple screens, you need to add an additional Tidbyt Instance for the additional car. Make sure you also always enter your API key as well as your Site ID at the very top of the App details page.
Show logo frame

This screen shows the following information:
- Just shows the Solar Manager logo 🙂
Important information about selecting multiple screens to be displayed
Each screen comes with animations that show what is going on. These animations only work if not more than one screen is selected from the main menu. If you select more than one, all screens will be displayed, but animations will not show.
If you like to have each screen animated, you need to run a separate instance for each screen. You do this by just adding the app again in your Tidbyt app, pasting the API Key and SiteID information again and then selecting the screen you would like to have displayed.
This is a little tedious, but you only need to do this once per individual screen.
Other settings
At the very bottom of the app settings you can also choose how long each screen will be displayed on your Tidbyt. You can chose between 1-5 seconds.


[…] hat ein Solar Manager Anwender eine eigene App programmiert und die lässt sich mit vielen Funktionen konfigurieren. Besonders gelungen ist die Anzeige der […]
Hi Marc, Thank you for your detailed guide, which I followed. I have copied my API key and also entered the site ID.
Unfortunately, the Tidbyt does not connect to the SolarManager cloud. For the API key, I wasn’t sure if I had to enter the ‘ as well as the last character = at the end of the key, but in all combinations I don’t see any data in the tidbyt, a crossed out cloud symbol appears in the app.
Do I have to allow sharing cloud data somewhere or does it just take a long time to sync with the cloud? Maybe an issue due to our firewall @home (Fortigate)?
Thanks in advance for your support.
Rolf
Hi Rolf – for the API key you just have to enter the value without the “‘”. I am not aware of any issues with regard to access. If the solarmanger API website works for you in your own network, then it should also work for your Tidbyt.
However, ever since our last App update on June 17th all Tidbyt / Solarmanager users have reported issues with the black “no cloud” icon error in the app. So you are not alone and you are most likely doing nothing wrong. We are hoping that this will be fixed by the end of this week.
Please let me know if it starts working again by maybe Wednesday evening or Thursday.
Sorry for the inconvenience.
Marc
Hi Marc
Many thanks for your Solar Manager App for Tidbyt implementation! I’m usig it since a long time and I’m very happy with having the SM stats on the tidbyt screen.
I’m using the EV stats as well (Skoda Enyaq). Since some days they have added the Fiat 500e as well in order to use it for limit loading. In order to make my wife happy it would be great you could add the Fiat logo to the selection lsit of the EV brands too 🙂
Many thanks in advance!
Cheers,
Koni
hi Koni – sure, I will create an additional logo and will let you know once it is available in the app. Have a great and sunny week ! 🙂 and thanks for the positive comments ; ) – Marc